


What is an OpenComponents Toolkit App?
An OpenComponents toolkit app is a quick way to test a plugin’s functionality including, but not limited to, performing automated unit tests.
This document shows how to setup and troubleshoot an OpenComponents toolkit app that will connect to an existing Findur session and make the magic happen.
There is an additional license for OpenComponents, so if you aren’t sure whether your site is licensed, contact us and we can help you review the license features on your key.
Create a Launch Configuration
This section describes how to setup a debug configuration in Eclipse. There is a sample plugin at the end of this post if you don’t have one already.
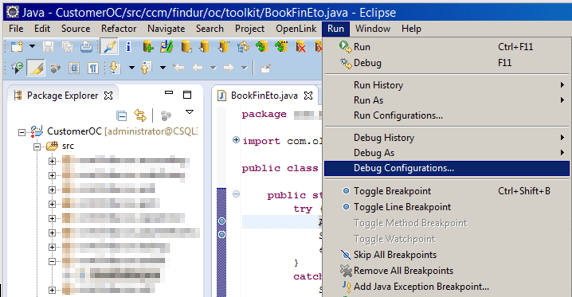
Each toolkit app needs to have a Launch Configuration. Run | Debug Configurations…
Create a new launch configuration by clicking on the New Launch Configuration icon. If you have one that already works, save yourself the trouble and right click on the existing debug configuration and select Duplicate. This will copy across all of the information so all you need to do is rename it and point it at the new Main class.

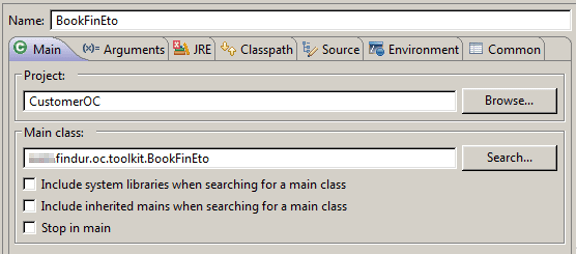
If you created a new launch configuration then there is nothing to change on the Main tab. This is where the launch configuration is named (in the field at the top called Name). The name is not important but make it meaningful for your own benefit. Assign the static java main in the field named Main Class.
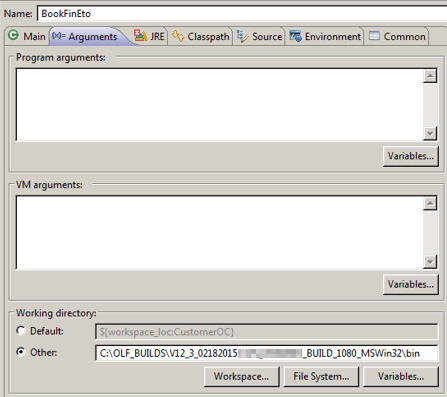
On the Arguments tab, make sure the Working Directory field points to the correct build’s \bin\ directory. If you don’t do this, the toolkit app will fail at runtime with an exception about an incompatibility between the JAR versions.
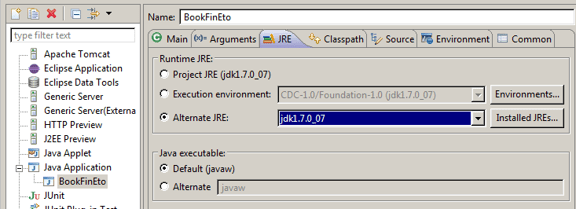
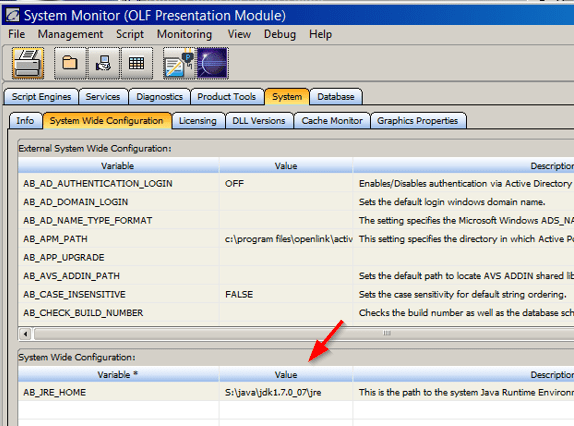
Make sure the JRE is setup correctly. Here, I have made sure to use the same JRE referenced by AB_JRE_HOME.
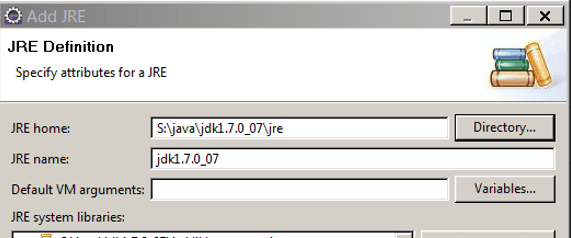
If you need to change the JRE, click on Installed JREs. Add | Standard VM. Login to the database and lookup the Env Variables.

Set the JRE home in Eclipse to match the Findur environment variable setting.
Run the App
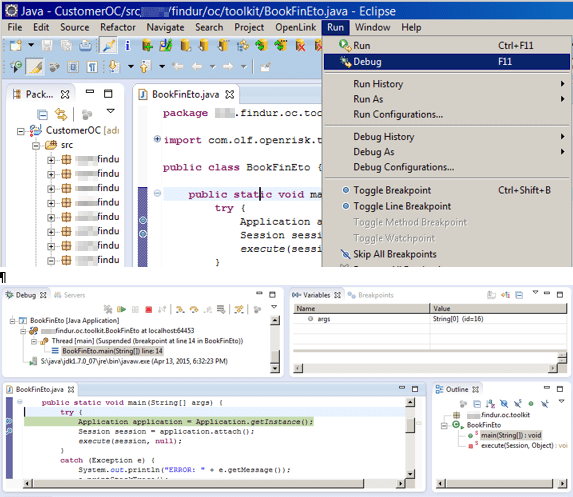
To run the toolkit App from Eclipse, add a break point at the beginning of the java main() and select Run | Debug.
Troubleshooting
There are several exceptions that can arise during execution. This section describes some problems you might encounter and solutions. Exception messages in Eclipse are notoriously vague, with the same exception message associated with upwards of five different solutions.
If you encounter an exception that is not listed here, contact us, and we can help you through the problem, and update this post with the details!
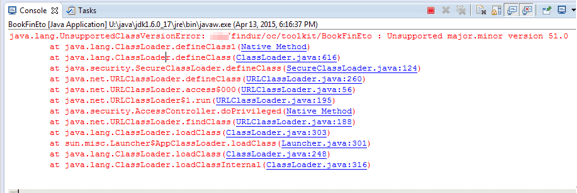
Unsupported Major.Minor Version
Unsupported major.minor version 51. This means that you skipped the JRE section above. Lookup the AB_JRE_HOME and set that up as the JRE in the Run/Debug Configuration.
Unsupported Major.Minor Version
Lookup the AB_JRE_HOME and set that up as the JRE in the Run/Debug Configuration.
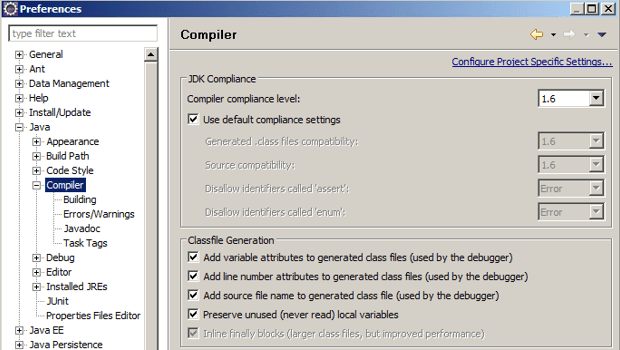
It is also possible that you are using the wrong version JRE to compile the project. Window | Preferences.
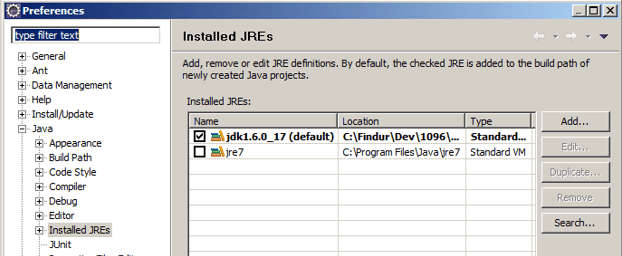
Ensure the Installed JRE (above) matches the Compiler Compliance Level (below).
Could not Find or Load Main Class
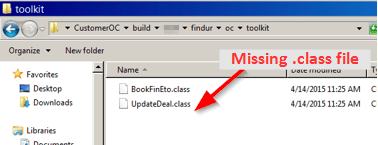
Sometimes an app will throw an exception ‘Error: Could not find or load main class [package].[class].’ This means there is a missing .class file, which can occur if the source .java files have not been built. It is usually the result of a compilation problem, but we have seen issues with Eclipse that can be resolved by closing Eclipse and reopening it.

Error: Could Not Find or Load Main Class
The project’s build directory is missing the require .class file.
Go to Window | View | Problems to see the source of the problem.

Usually the compilation failure is a genuine issue. You should resolve the cause of the compilation failure by correcting the incorrect code, or resolving the missing build path dependency. If those problems can be ruled out, closing Eclipse and re-opening it may resolve this problem. The .class files get rebuilt.
Sample Plugin
This class file loads deal num 203503, updates the notional on leg 0, and processes the deal to Validated.
package com.findur.oc.toolkit;

import com.olf.openrisk.application.*;
import com.olf.openrisk.trading.*;

public class UpdateDeal {
	private static int DEAL_NUM = 203503;
	public static void main(String[] args) {
		Application application = Application.getInstance();
		Session session = application.attach();
		TradingFactory tf = session.getTradingFactory();
		Transaction transaction = tf.retrieveTransaction(DEAL_NUM);
		Leg leg = transaction.getLeg(0);
		double notional = leg.getValueAsDouble(EnumLegFieldId.Notional);
		leg.setValue(EnumLegFieldId.Notional, notional + 1000.0);
		transaction.process(EnumTranStatus.Validated);
	}
}